Mastering Latte Art: A Complete Guide for Home and Professional Baristas
Latte art is more than just a decorative touch - it is an essential skill that enhances the coffee experience. Whether you’re a home barista or a seasoned professional, learning how to make latte art improves not only the aesthetics of your coffee but also the texture and taste of the milk. This guide will cover everything from what is latte art to how to pour latte art, including choosing the right latte art pitcher, milk pitcher for latte art, and how to practice latte art without waste.
What is Latte Art?
Latte art is the technique of pouring steamed milk into espresso in such a way that it creates beautiful designs on the surface of the drink. It relies on the contrast between the deep brown espresso crema and the creamy white milk foam. The most common latte art designs include:
-
Heart: A simple, classic design that’s great for beginners.
-
Rosetta (Fern Leaf): Requires precise control over milk flow to create symmetrical leaves.
-
Tulip: Created by stacking layers of milk foam to form delicate petals.
-
Swan: An advanced design requiring refined pouring techniques.

Latte art is not just about aesthetics - it also signifies well-textured milk, a perfectly extracted espresso shot, and precise pouring skills.
How to Make Latte Art: Step-by-Step Guide
Perfecting how to do latte art requires mastering three key steps: pulling a great espresso shot, steaming the milk correctly, and pouring with precision.
1. Pulling the Perfect Espresso Shot
A great espresso shot provides the crema necessary for latte art. Follow these tips:
-
Use fresh, high-quality coffee beans (preferably specialty beans like Bazan Coffee’s Fine Robusta).
-
Grind the beans to a fine consistency to ensure proper extraction.
-
Aim for a 25-30 second extraction time for a well-balanced espresso.
-
Ensure a thick crema as this will contrast well with the steamed milk.
2. Steaming the Milk for Latte Art
Milk texture is critical for latte art. The goal is to create microfoam - a smooth, velvety milk consistency without large bubbles. Here’s how:
-
Use a latte art pitcher or milk pitcher for latte art with a precise spout.
-
Fill the pitcher with cold milk (whole milk is best - more on that later).
-
Position the steam wand just below the milk’s surface to introduce air for the first few seconds.
-
Submerge the wand to heat the milk evenly until it reaches 140-160°F (60-70°C).
-
Swirl the milk after steaming to remove any large bubbles and create a glossy texture.
3. How to Pour Latte Art
Now comes the most challenging part: the pour. Follow these steps:
-
Start from a height of 4-5 inches above the cup and pour slowly into the center of the espresso.
-
Lower the pitcher as the cup fills to integrate the milk with the espresso.
-
For a heart shape: Tilt the cup slightly and pour in the center. Move the pitcher slightly forward and finish with a quick lift.
-
For a rosetta: Slightly wiggle the pitcher side to side as you pour and pull through the center at the end.
-
For a tulip: Pour multiple small drops of milk, layering them on top of each other.

Best Milk for Latte Art: What Milk is Best for Latte Art?
The type of milk you use plays a crucial role in creating beautiful latte art. The best milk for latte art should have the right balance of fat and protein to create a stable microfoam.
Best Dairy Options:
-
Whole Milk (3.5% fat) – The best option for smooth, creamy foam and strong contrast.
-
2% Milk – Less creamy than whole milk but still workable.
-
Skim Milk – Produces more foam but lacks richness.
Best Non-Dairy Options:
-
Oat Milk (Barista Edition) – Best non-dairy milk for latte art, with a similar texture to whole milk.
-
Soy Milk (Barista Edition) – Forms stable foam but can curdle if overheated.
-
Almond Milk – More difficult to work with due to lower protein content.
For the best results, Bazan Coffee recommends using whole milk or barista-grade oat milk.

Choosing the Right Latte Art Pitcher
A high-quality latte art pitcher or milk pitcher for latte art significantly improves your pouring control. Consider these features when selecting one:
-
Material: Stainless steel pitchers retain heat better and are more durable.
-
Spout Design: A narrow spout allows for better precision, essential for detailed latte art.
-
Size: A 12 oz pitcher is ideal for single servings, while a 20 oz pitcher is great for larger drinks.
Recommended pitcher brands include:
-
Motta Europa Milk Pitcher
-
Fellow Eddy Steaming Pitcher
-
Barista Hustle Precision Pitcher

How to Practice Latte Art Without Waste
Practicing latte art requires multiple attempts, but constantly steaming milk can lead to unnecessary waste. Here are some ways to practice without wasting milk:
-
Use Water and Dish Soap: Fill a latte art pitcher with water and add a drop of dish soap. Steam it like milk to practice texturing.
-
Reuse Milk in Training Sessions: If practicing alone, use the same milk for 2-3 attempts before discarding.
-
Draw on Paper: Before pouring, practice your hand movements by drawing latte art designs on paper with a marker.
-
Use Small Portions: Steam a minimal amount of milk (around 4 oz) instead of a full pitcher.
These methods allow you to refine your skills while reducing milk waste.
Common Latte Art Mistakes and How to Fix Them
Even experienced baristas encounter challenges when pouring latte art. Here’s how to correct some common mistakes:
|
Issue |
Cause |
Solution |
|
Milk is too bubbly |
Too much air introduced during steaming |
Keep the steam wand just below the surface and lower it after a few seconds |
|
Milk is too thin |
Not enough air incorporated |
Start by incorporating a small amount of air before submerging the wand |
|
No contrast in latte art |
Espresso crema is too weak |
Use fresh coffee beans and ensure proper espresso extraction |
|
Art doesn’t hold its shape |
Pouring too fast or at the wrong angle |
Pour slower and adjust wrist movements |
Elevate Your Coffee Experience with Bazan Coffee
At Bazan Coffee, we understand that while some people prefer caffeine-free options, others love the bold and energizing experience of high-quality coffee. That’s why we offer exceptional specialty coffee for those who enjoy a caffeine boost, particularly our Fine Robusta – Krong Nang, one of Vietnam’s finest high-altitude coffees.
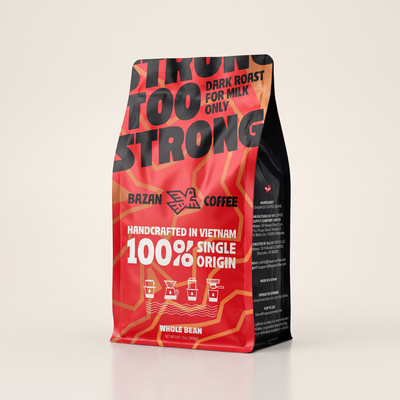
Brew It with Too Strong: Vietnam’s Bold Robusta
Too Strong is 100% Vietnamese Robusta from Đắk Lắk, dark roasted to stand up to milk and ice. It carries roughly twice the caffeine of a typical arabica blend (about 2.2–2.7%), with notes of chocolate, caramel and warm toast and none of the burnt, bitter bite.
- Made for milk: built for cà phê sữa đá, lattes and iced coffee.
- Brew it your way: phin filter, espresso machine, French press or paper filter.
- Fresh from the farm: roasted date printed on every bag.