Mastering the Art of Tulip Latte Art: A Comprehensive Guide
Latte art transforms a simple cup of coffee into a canvas for creativity, enhancing the sensory experience of your beverage. Among various designs, the tulip stands out for its elegance and complexity. This guide will walk you through the essentials of crafting the perfect tulip latte art, from understanding the basics to mastering advanced techniques.
Understanding Tulip Latte Art
The tulip design is a staple in latte art, characterized by layered hearts stacked atop one another, creating a floral pattern resembling a tulip. This design not only showcases the barista's skill but also enhances the aesthetic appeal of the coffee.

Essential Tools and Ingredients
To begin your journey in creating tulip latte art, ensure you have the following:
-
Espresso Machine: A reliable machine capable of pulling consistent shots with rich crema.
-
Milk Frothing Pitcher: A stainless steel pitcher with a narrow spout is ideal for precise pouring.
-
Fresh Coffee Beans: High-quality beans, such as those offered by Bazan Coffee, ensure a robust flavor and excellent crema.
-
Thermometer: To monitor milk temperature during steaming.
Step-by-Step Guide to Creating Tulip Latte Art
1. Pulling the Perfect Espresso Shot
-
Grind Fresh Beans: Use freshly ground coffee to maximize flavor and crema quality.
-
Dose and Tamp: Measure the appropriate amount of coffee (typically 18-20 grams for a double shot) and tamp evenly to ensure uniform extraction.
-
Extract the Shot: Aim for a 25-30 second extraction time to achieve a balanced espresso with a rich crema.

2. Steaming the Milk
-
Choose the Right Milk: Whole milk is preferred for its higher fat content, resulting in a creamier microfoam.
-
Fill the Pitcher: Pour cold milk into the pitcher, filling it up to the bottom of the spout dent.
-
Aerate the Milk: Submerge the steam wand just below the surface of the milk and turn on the steam. You should hear a paper-tearing sound, indicating proper aeration. Aerate for about 3 seconds.
-
Texture the Milk: After aeration, submerge the steam wand deeper to create a whirlpool motion, heating the milk evenly. Aim for a final temperature of 150°F (65°C).
-
Groom the Milk: Tap the pitcher on the counter and swirl gently to eliminate any large bubbles, resulting in a smooth, velvety microfoam.

3. Pouring the Tulip Design
-
Start the Pour: Hold the cup at a slight angle and begin pouring the milk from a height of about 6 inches above the cup's surface. This helps the milk integrate with the espresso.
-
Create the Base Layer: As the cup fills halfway, lower the pitcher closer to the surface and pour a small dot of milk into the center to form the base of the tulip.
-
Layer the Petals: Move the pitcher slightly forward and pour another dot, slightly overlapping the first. Repeat this process to create additional layers, typically three to four, depending on your desired tulip size.
-
Finish the Design: Once the layers are complete, gently lift the pitcher and draw a thin line through the center of the design to anchor the petals, completing the tulip pattern.

Tips for Perfecting Your Tulip Latte Art
-
Consistent Practice: Regular practice is essential to refine your pouring technique and achieve symmetry in your designs.
-
Control the Pour: Maintaining a steady hand and consistent pour speed is crucial for creating clean layers.
-
Experiment with Milk Textures: Adjusting the milk's microfoam can impact the design's clarity and contrast.
-
Use Appropriate Tools: A milk pitcher with a narrow spout provides better control for intricate designs.
Frequently Asked Questions (FAQs)
Q: How can I practice latte art without wasting milk?
A: To minimize waste, you can practice with a mixture of water and a drop of dish soap, which simulates the texture of steamed milk. This allows you to hone your pouring technique without using actual milk. citeturn0search18
Q: What is the ideal milk temperature for latte art?
A: The optimal milk temperature is between 150°F and 155°F (65°C - 68°C). This range ensures a smooth microfoam and enhances the milk's natural sweetness.
Q: Can I use non-dairy milk for latte art?
A: Yes, barista-formulated non-dairy milks, such as oat or almond milk, can be used. However, they may require adjustments in steaming technique due to differences in protein and fat content.
Q: How important is the espresso shot in latte art?
A: A well-extracted espresso shot with a rich crema is essential, as it provides the canvas for your latte art. Poor-quality espresso can hinder the clarity and contrast of the design.
Elevate Your Coffee Experience with Bazan Coffee
At Bazan Coffee, we understand that while some people prefer caffeine-free options, others love the bold and energizing experience of high-quality coffee. That’s why we offer exceptional specialty coffee for those who enjoy a caffeine boost, particularly our Fine Robusta – Krong Nang, one of Vietnam’s finest high-altitude coffees.
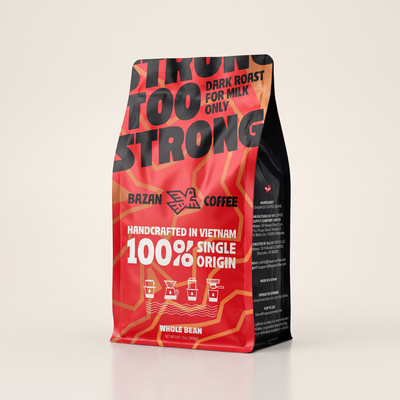
Brew It with Too Strong: Vietnam’s Bold Robusta
Too Strong is 100% Vietnamese Robusta from Đắk Lắk, dark roasted to stand up to milk and ice. It carries roughly twice the caffeine of a typical arabica blend (about 2.2–2.7%), with notes of chocolate, caramel and warm toast and none of the burnt, bitter bite.
- Made for milk: built for cà phê sữa đá, lattes and iced coffee.
- Brew it your way: phin filter, espresso machine, French press or paper filter.
- Fresh from the farm: roasted date printed on every bag.